
The Role of Acceptance Agents
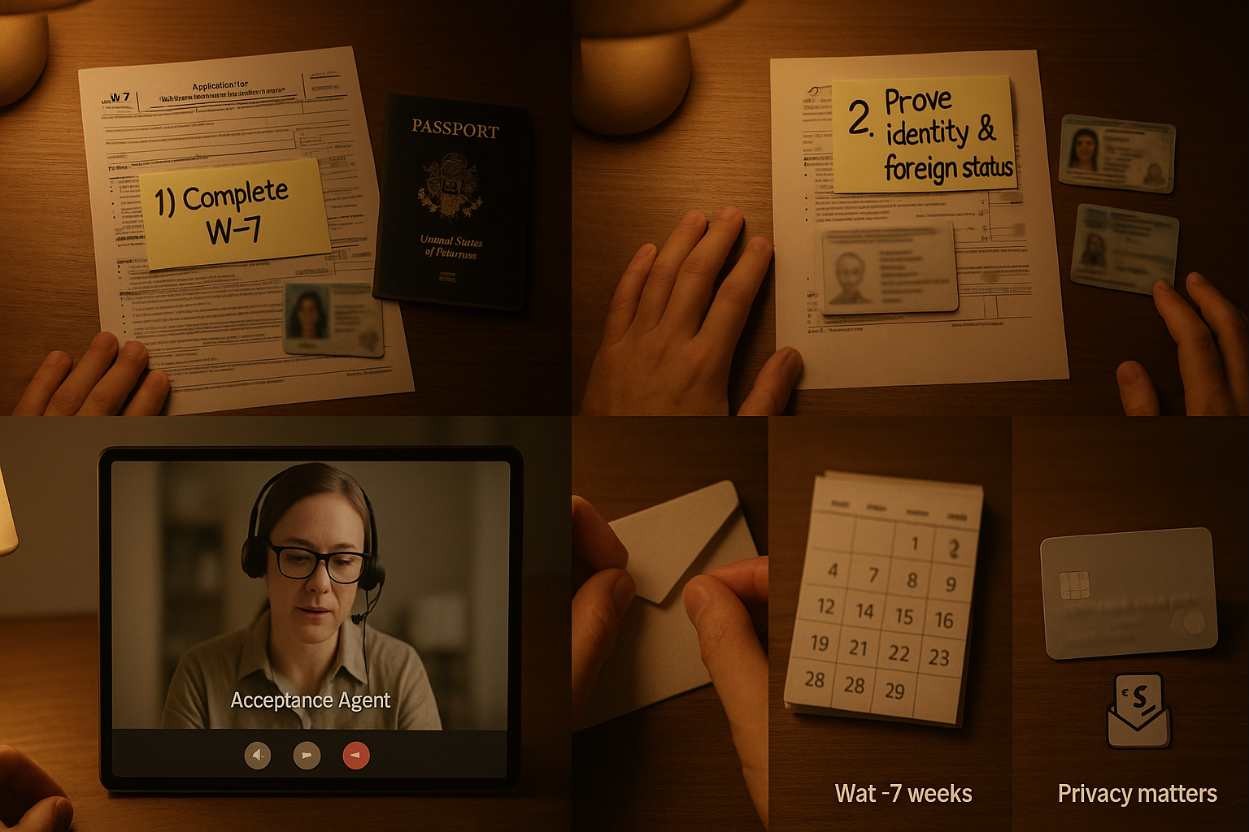
Acceptance Agents play a crucial role in your ITIN application process. They are authorized by the IRS to assist individuals in obtaining their ITINs without needing to send their documents directly to the IRS, which can make things a lot easier. I relied heavily on an Acceptance Agent when I applied for mine, mainly because I wanted to ensure all my paperwork was in order. They guide you through the process, check your application, and answer those nitty-gritty questions you might have. If you’re feeling lost or just need that extra handholding, reaching out to an Acceptance Agent can feel like having your own personal coach.
You provide your info while they do the heavy lifting, ensuring everything is correct. It can also potentially speed things up a bit since they are familiar with the ins and outs of the application process. And the best part? Most of them are friendly and genuinely interested in helping you. Choosing an Acceptance Agent might just save you from a lot of headache down the line because navigating the IRS can sometimes be challenging.
Setting Up Your Appointment
Once you’ve recognized the importance of an ITIN, the next step is scheduling an appointment. Many folks are surprised to find out that the IRS doesn’t just issue ITINs automatically, so you’ll need to take action. The first thing you would do is check the IRS website, where you can easily find a list of authorized Acceptance Agents or see what locations have in-person services. I always suggest looking for one nearby because it turns the sometimes overwhelming task of paperwork into a less daunting experience when you can ask questions face to face. When you reach out to schedule your appointment, be clear about your needs; don’t be shy!
Most agents are happy to help you through this process and answer any concerns. By bringing all your required documents – such as identification and tax forms – you can save yourself a lot of back and forth. Did I mention that bringing a friend or family member along might ease the stress? It definitely helped me with my own appointment. Just make sure to set a reminder once the date is locked in, and you’ll be on your way to getting that ITIN!
What Happens After Your Appointment?
After your appointment, the waiting game begins. This can feel like the most agonizing part, especially when you’re eagerly awaiting that ITIN. Generally, you can expect to receive your ITIN by mail in about 7 weeks; however, it sometimes varies—especially during those busy tax seasons. Knowing what to expect kept my anxiety in check during the long wait. During this time, it’s wise to keep all the documents you submitted and any correspondence handy in case you need to follow up or make any inquiries. And it’s totally okay to check on your application status if it’s taking longer than expected!
That waiting period is also the perfect opportunity to get your tax documents in order, so when your ITIN arrives, you’re ready to file your taxes without a hitch. Remember, though, once you receive that number, keep it safe; it’s a crucial piece of your financial identity! With the anticipation behind you and your ITIN in hand, you’ll be ready to tackle any financial responsibilities coming your way.
Tips for a Smooth Appointment Experience
Going into your appointment prepared can really set the tone for a smooth experience. For starters, I always suggest practicing your introduction; it’s a bit nerve-wracking at first. You might want to record yourself or just say it out loud until it starts feeling more natural. Secondly, arriving a bit early helps too! Not only does it allow you to settle in, but it also gives you time to review your documents one last time to make sure everything’s in place. A small notebook can be great for jotting down any questions you think of while you wait; you might forget them if you don’t capture them.
And don’t hesitate to reach out for help; if you’re confused on any paperwork during the appointment, it’s better to ask instead of guessing. Lastly, remember to breathe; I sometimes forget that, and it really helps! It’s a significant step towards establishing your tax identity, so approach it with a mindset of excitement rather than fear. Once it’s all said and done, you’ll feel so proud knowing you tackled this step!
Required Documents for Your Appointment
Alright, so now you’re all set for your appointment, but let’s talk about what you’ll need to bring. It’s one of those things that can totally make or break your appointment. Generally, you’ll need to provide proof of identity and foreign status, so passports and other documents serve that purpose. I remember, when I was preparing for my own appointment, I wasn’t sure about the documents, so I double-checked the IRS guidelines and even asked the agent for a list beforehand. It really put my mind at ease! Another critical document is the completed Form W-7; trust me, having this filled out ahead of time simplifies everything.
If you’re applying as a dependent, you’ll need documents proving that relationship, which could include birth certificates or court documents. It’s a good practice to always have copies of everything you bring; sometimes things get lost or misplaced, and having backup is super helpful. With all your documents lined up and ready to go, the fears of forgetting something crucial become less scary. So, gather everything, double-check it, and you’ll feel ready like I did on my appointment day!